In the fast-paced world of modern communication, Outlook Email Tagging is the best way to manage your inbox efficiently is paramount. With the sheer volume of emails flooding in daily, it’s easy to lose track of important messages and deadlines.
That’s where email tagging comes in. By implementing a tagging system in your Outlook inbox, you can streamline your workflow, and prioritize tasks. This guide will walk you through the steps to create tags for emails in Outlook to take control of your inbox.
Why Email Tagging?
Email tagging is a powerful organizational tool that allows you to categorize and label your emails according to their content, importance, or any other criteria you choose.
How Do I Create An Email Tag In Outlook?
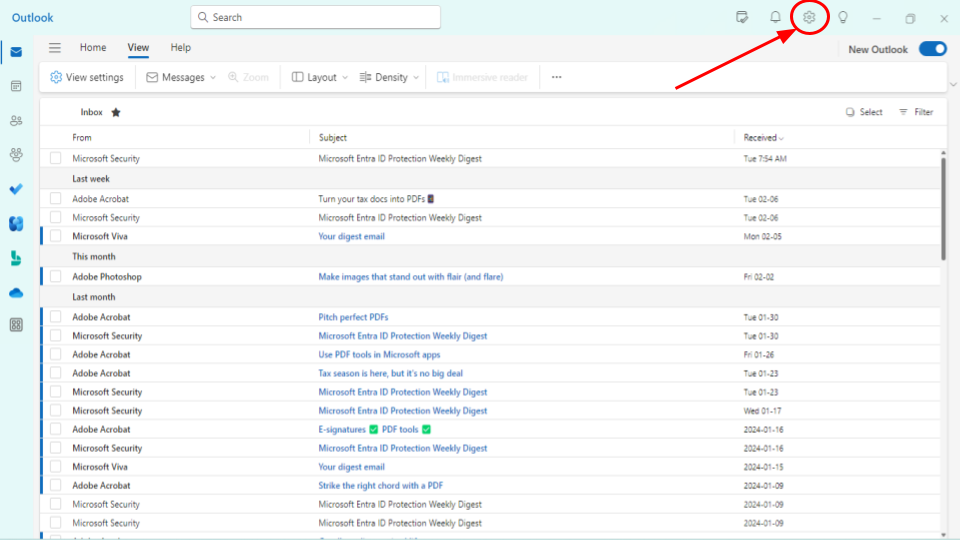
1. Go to Settings in Outlook
Open Microsoft Outlook and navigate to your inbox. Locate the settings in the upper right corner. Click on it.
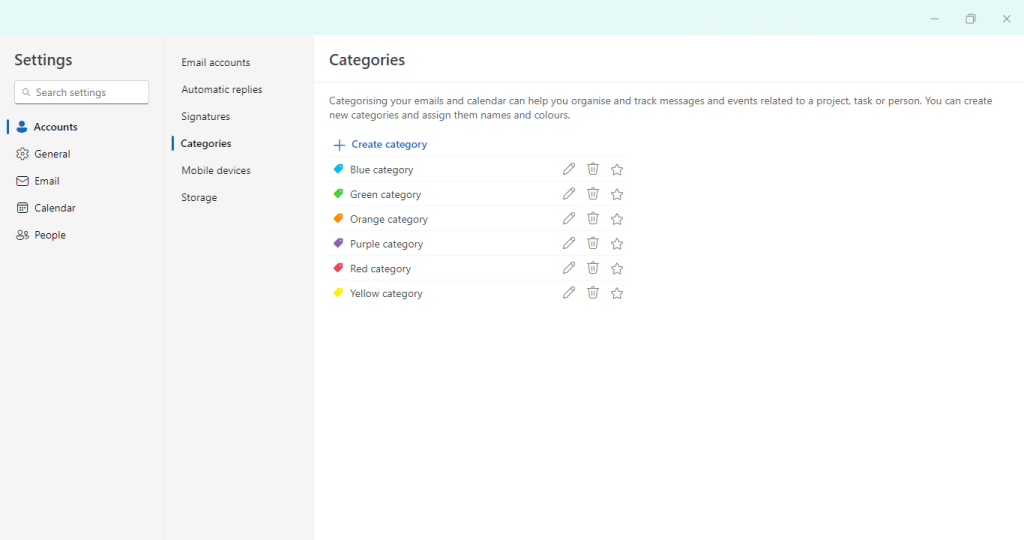
2. Find Categories in Settings
Go to Accounts and click Categories, there you will find Tags with the color names. Click on the pen icon to edit any existing tag. You can either delete any of them by clicking on the Bin button or mark them as favorites by clicking on Star.
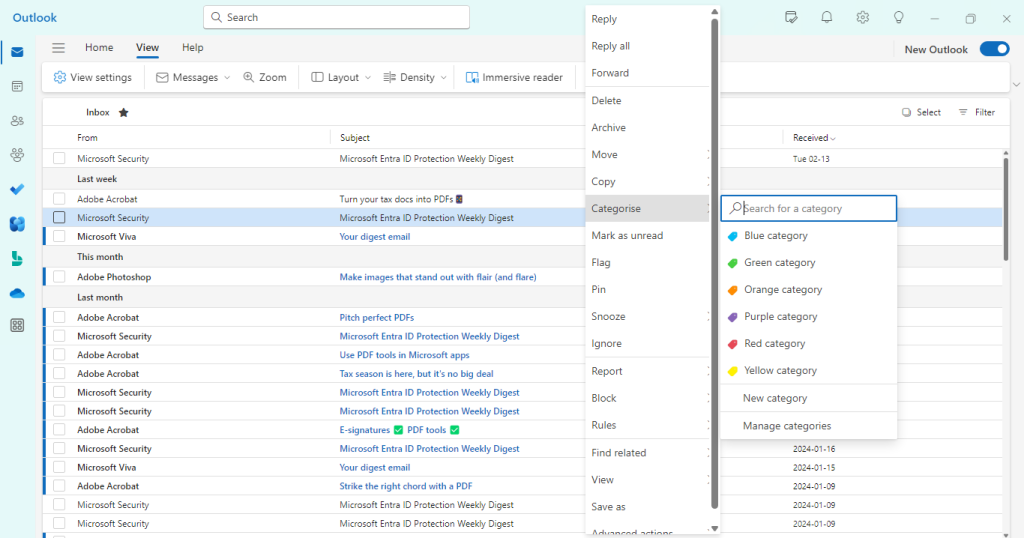
2. Creating a New Tag
Once you’ve selected the desired emails, click New Category to create one. From the menu, choose the option labeled “Categorize” or “Tags” (depending on your Outlook version).
3. Choosing a Tag Color
In the submenu that appears, select “New” or “Add New Category.” A dialog box will appear, allowing you to enter a name for your new tag and choose a color. This color-coding system will make it easier to identify tagged emails at a glance.
4. Assigning the Tag
After naming your new tag and selecting a color, click “OK” to confirm. Now right-click on
5. Customizing Tag Names
To further personalize your tagging system, you can create additional tags for different types of emails, projects, or contacts. Simply repeat the above steps to create as many tags as you need, using distinct names and colors.
How Do I Auto-Tag An Email In Outlook?
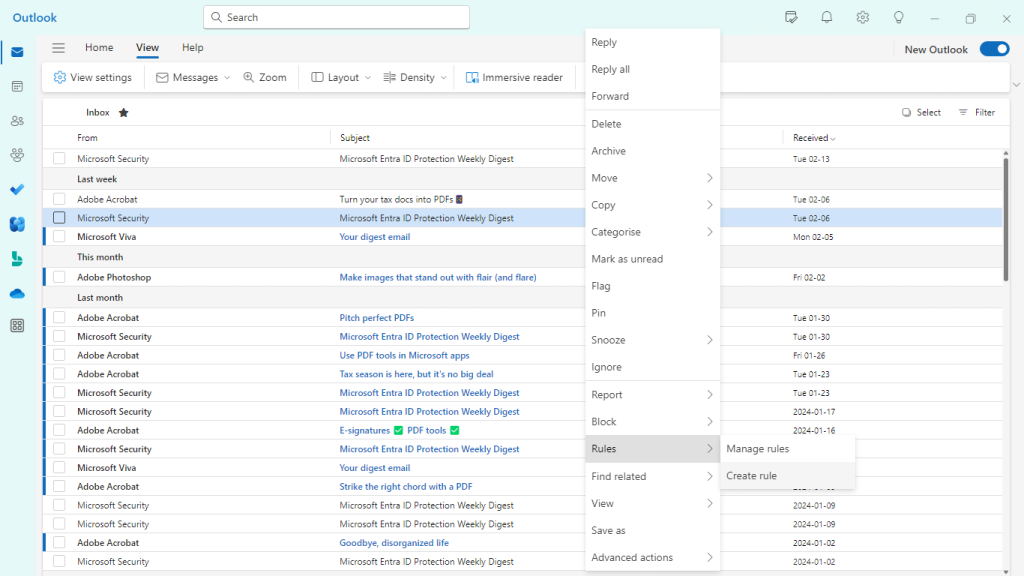
1. Create Rule
You can enable auto-tag by creating a rule on specific emails. To do this you need to right-click on any email you want to create a rule on, select “Rules” and Click on “Create Rule”
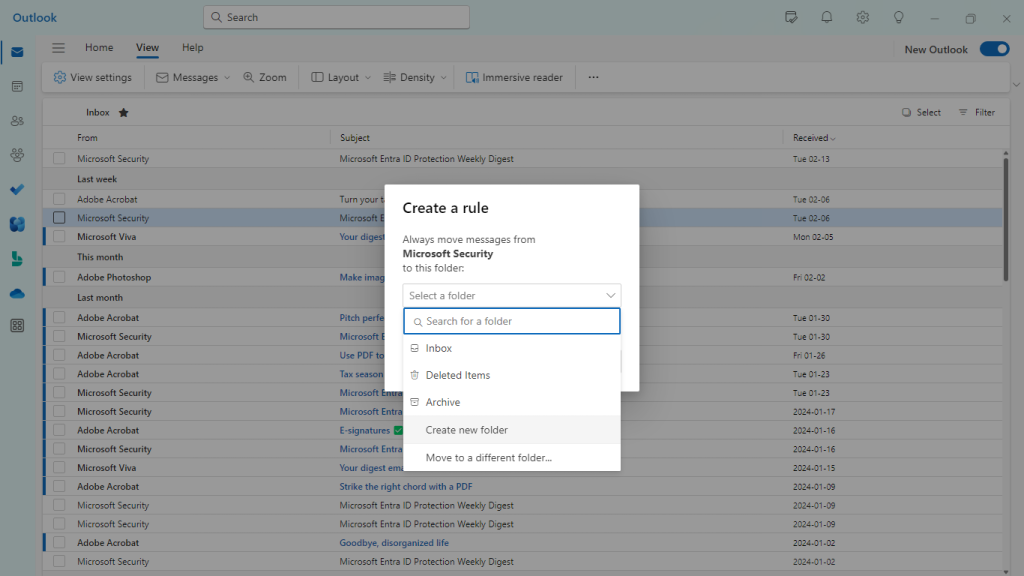
2. Specify Folder for Rules
You can specify any folder you want your email to go automatically to or create a new folder for it.
Introducing Automated Email Warm-up
While mastering email tagging can significantly enhance your productivity, emails going to the receiver’s spam can be a big challenge for marketers and small business owners.
This is where Automated Email Warmup comes in. This tool is designed to help you optimize your email deliverability by gradually increasing the sending volume of your outbound emails.
Automated Email Warm-up works by simulating natural email sending patterns, preventing your messages from being flagged as spam or ending up in recipients’ junk folders. By gradually increasing your email sending volume over time, this tool ensures that your emails never get spammed.
Conclusion
In conclusion, implementing an email tagging system in Outlook can revolutionize the way you manage your inbox. By following the steps outlined above, you can create custom tags for your emails and streamline your workflow with ease.
Leave a Reply